You can start Side Ops any time you want – whether it is when you’re free-roaming, or undertaking a Main Mission. As long as it is close to your current objective, there shouldn’t be a problem.
It’s worth noting that some Side Ops are unlocked only after you get soldiers with a particular set of skills to join your group.
In this post, you’ll find Metal Gear Solid 5 Side Ops – 1 to 25
For more, please check our other posts:
- Metal Gear Solid 5 Side Ops – 26 to 50
- Metal Gear Solid 5 Side Ops – 51 to 75
- Metal Gear Solid 5 Side Ops – 76 to 100
- Metal Gear Solid 5 Side Ops – 101 to 125
- Metal Gear Solid 5 Side Ops – 126 to 157
Metal Gear Solid 5 Side Ops 1-25

Side Ops #1 – Extract Interpreter – Russian
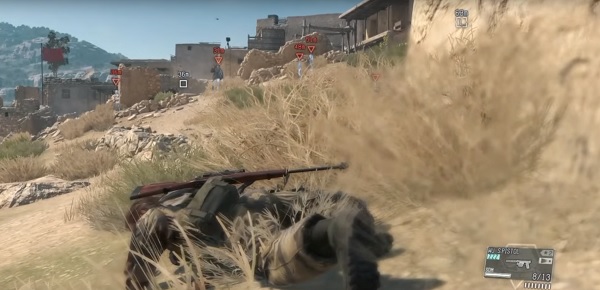
This is the first Side Ops that you’ll start. It’s quite easy – hence, it’s the first. The mission requires Big Boss to reach an outpost and extract the translator out of there. You can take all three guards, but the one that you need will be the one who speaks English.
I found that a truck occasionally drives around the area. It can easily spot you if you’re just lollygagging around. Check if the coast is clear before getting out of the outpost.
I recommend doing this Side Op immediately when it becomes available as you are in need of good translators.
Side Ops #2 – Extract Interpreter – Pashto
This Side Op can only be started after you complete Side Op 47.
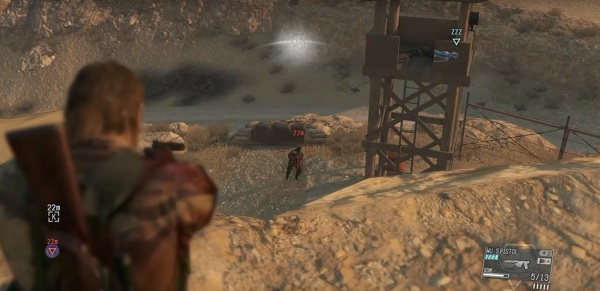
This prisoner is being held hostage at the guard post number 20 on the map. The Pashto Interpreter is shielded by 5 soldiers. What you need to do is use Tranqs. Shoot them at the watchtower guard first then move slowly and take out the rest.
Soldiers won’t call in for back-up this time around, so you have all the time in the world to Tranq them all up.
Extract the interpreter along with the soldiers in order to conclude the mission.
Side Ops #3 – Extract Interpreter – Afrikaans
This is one of the easiest Side Ops in the game. The Afrikaans interpreter is located in the S-W section of the circle. In the abandoned house, you’ll find some soldiers guarding him. Remember, scan all of them first so you don’t kill your valuable target by mistake. Extract the target, do whatever you wish with the soldiers and mark this side ops as completed.
Side Ops #4 – Extract Interpreter – Kikongo
Again, an easy Side Ops. This time around though, it will be best to take your time to search for resources as there are plenty to loot. Check houses to see what resources you can take, and what containers you can Fulton out of there.
For the Kikongo interpreter, the guards are clueless and few. You won’t see any super-geared soldier here.
Side Ops #5 – Secure the RIOT SMG Blueprint
This Side Op can only be started after finishing Side Op 1.
The RIOT SMG blueprint is lightly guarded, as there are maybe a couple of soldiers patrolling around. The RIOT SMG blueprint is located in the east section of the Da Wialo Village.
Once you locate the shed, get inside, and the blueprint can be found just behind the couch.
Side Ops #6 – Secure the Stun Arm Blueprint
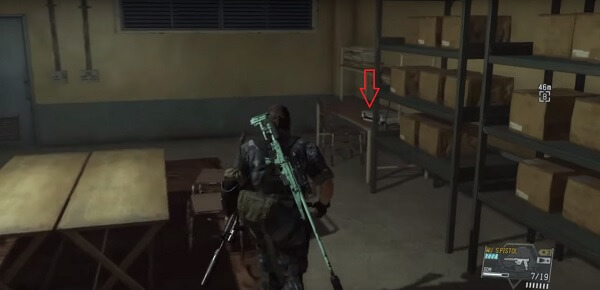
This one is a little bit tricky. It’s located inside the Serak Power Plant, a compound which is heavily guarded. Consider going in when night falls as to capitalize on your immense stealth potential. The Stun Arm blueprint is found in the N-E building. It’s in plain sight, waiting for you to grab it, on a table. You can also catch some soldiers and interrogate them to precisely pin-point the building.
Grab the blueprint to complete this Side Op.
Side Ops #7 – Secure the IR-Sensor Blueprint
This blueprint is super easy to find and snatch. It’s located inside one of the buildings at the south of the village. There aren’t that many buildings at the south end, so search a little bit and you’ll have it in no time. It’s not guarded by anything.
Side Ops #8 – Secure the Antitheft Device Blueprint
Go to the Masa Village, at the east guard post. There are a few snipers to take care of, and several other troops present. The blueprint can be found inside a tent. I recommend using Tranqs for the snipers as they are the most dangerous ones.
Soldiers aren’t heavily geared so they won’t be a big pain in the butt.
Side Ops #9 – Secure the Gun-Cam Defender Blueprint
Go to the north-west point of the airport. There, you’ll find a building. Take your time as the area is riddled with a ton of resources. Clean the house of goodies and then look for the Gun-Cam Defender blueprint.
Side Ops #10 – Secure the UA-Drone Blueprint
The blueprint can be found within the base. There’s a petite building located in the middle of the area. Sneak until you reach it. As there are no soldiers specifically guarding it, there’s no need to use force.
Side Ops #11 – Extract – Highly Skilled Soldier 01
This Side Op can be started only after you have completed Mission #1 – A Heros Way
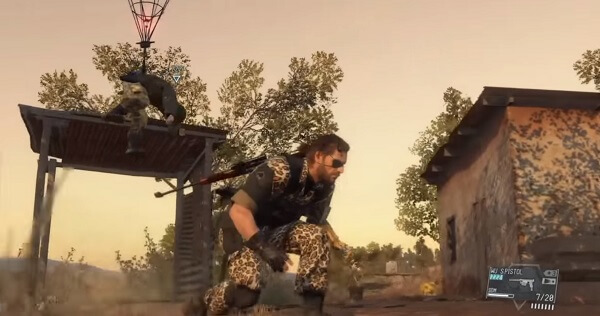
This valuable target is located at the top of the hill. If you try to come from the south and onto the bridge, he will start shooting at you. You can’t avoid his bullets, but you can avoid going to the southern bridge.
Instead, choose the western road. Climb on top of the hill, and you’ll be coming from behind. The Sniper will be accompanied by two friends. Mark your target with the Int-Scope as to not accidentally kill him if a brawl sparks.
Side Ops #12 – Extract – Highly Skilled Soldier 02
This Side Op can be started only after you have completed Side Op 28 – A Prisoner Extraction 02.
This target can be found at the Da Wialo Village’s eastern district. He is wearing a balaclava ski mask and a bodyguard is protecting him.
You first need to clear all of the soldiers around the area as it is quite heavily guarded. Snatch him up with a Tranq. I recommend waiting for a Sandstorm, if you have time to spare. Get in range and tranq both the highly-skilled soldier and his lackey guard.
Side Ops #13 – Extract – Highly Skilled Soldier 03
This Side Op can be started after you have completed Mission #6 – Where Do The Bees Sleep
If you are about to start Side Ops #13, it means that you are accustomed to the Da Smasei Laman area. Approach the zone by using the north hidden path. This will let you view all of the enemies below.
Your highly skilled soldier #3 is going to be found by a tent right next to the metal sheds. He will be wearing the usual – a metal helmet and a balaclava ski mask. Eliminating your foes is really hard, but it’s doable. You have to be patient and understand the patrol patterns.
Afterwards, snatch the highly skilled soldier.
Side Ops #14 – Extract – Highly Skilled Soldier 04
This Side Op can be started after you have completed Mission #7 – Red Brass.
We recommend you take DD along with you. he can sniff out the target’s location.
This Side Op is a little bit tough. Firstly, go to the top of Da Ghwandai Kar. There you’ll find a lone house. Inside of it, the soldier is relaxing. Why? Because he has a heavily-armored bodyguard protecting the front of the door. You can bait the guard away from the door, or, and this will require some skill on your part, stealthily grab him from one side.
Afterwards, the entrance is clear for you to go in an extract the soldier.
Side Ops #15 – Extract – Highly Skilled Soldier 05
Another sniper to join your ranks. This one can be found by going to the south section of guard post number 4. He is protected by a couple of friends. One is protecting him from danger coming from his right, while the other one is patrolling back and forth behind the two.
You have to silently Tranq the guy who is patrolling and quickly grab his friend on the right.
Don’t waste time as the area is swarming with soldiers. Fulton your highly skilled soldier out of there and run away.
Side Ops #16 – Extract – Highly Skilled Soldier 06
We recommend you take either DD along with you so he can sniff soldier locations, or Quiet, as she an easily eliminate enemy snipers.
Also, it would be best if you try this Side Op after you unlock Stun Arm level 3.
This highly skilled individual is located right in the middle of guard post number 20. He has 8 friends surrounding him, with three of them being snipers. Two snipers can be found on the hill above the post, and the lonely one is located on the hill right to the east.
Five soldiers are nearby so going in guns blazing isn’t a solution.
If you picked Quiet, then mark the Snipers first so she can take care of them. Or, you can do this too if you’ve chosen DD as your buddy.
Afterwards, just drop in on the top of the hill. You’ll be above the guard post. If you have Stun Arm level 3, you can blast them all and end it pretty quick. Extract your highly skilled soldier, and whoever you wish and this Side Op is finished.
Side Ops #17 – Extract – Highly Skilled Soldier 07
In order to grab this highly skilled warrior, you have to spawn on the western side of the area. He will be located right down the main road. He has five buddies guarding him. Two of them are snipers and three your usual soldiers. However, there’s also an armored vehicle present.
You have to sneak and quietly subdue the two snipers first. Afterwards, you’ll have to be patient and wait for the two patrolling soldiers to get out of the area. Quickly crawl until you reach the highly-skilled soldier and Fulton him out of there. You’ll most likely have to subdue the other soldier that is located at the opposite side of the tank.
Fulton him, and the armored vehicle too.
You can leave now as there’s no reason to wait for the other two patrolling soldiers.
Side Ops #18 – Extract – Highly Skilled Soldier 08
We recommend you take Quiet along with you on this Side Op as she can easily scout the base beforehand.
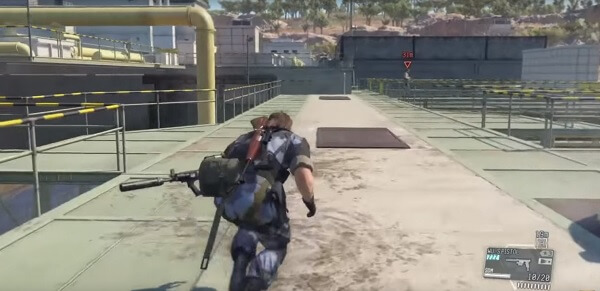
High skilled soldier number 8 can be found undearneath the destroyed red tank at the back of Mfinda Oilfield. Neutralizing this target is quite challenging as soldiers can easily detect Big Boss. Yet, that’s why we recommend bringing Quiet along.
You have to come in from the western side of the building – start from the muddy waters and make your way there. Quiet is great at subduing soldiers found standing in your way. Your highly skilled soldier will have a bodyguard protecting him. Sneak and crawl, get next to them both so they can be easily knocked out and Fulton their butts out of there.
Exit through the east district by Fultoning a container.
Side Ops #19 – Extract – Highly Skilled Soldier 09
We recommend you take Quiet along with you on this Side Op as she is of immense help when encountering a swarm of soldiers.
There’s no easy way to put this. Extracting highly skilled soldier number 9 is almost impossible. Head to the guard post number 10, and you’ll see him protected by over 10 guards. There are four snipers scouring the area with their scopes on all four sides of the guard post. Plus, there are a bunch of other guards right around him.
The best way to start this Side Op is to figure out which one of them likes to wander from the area. He’s most definitely a sniper. Subdue him and let Quiet do her thing – that is, masterfully neutralizing the rest of the snipers. However, you’ll have to reposition her as they are pretty far away from each other.
Your Stun Arm level 3 blast should do the trick and quickly neutralize the remaining six, or so, soldiers. Extract your highly skilled soldier and anyone else that you think is worthy of bolstering your Mother Base.
Side Ops #20 – Extract – Highly Skilled Soldier 10
We recommend you take Quite along with you as she’s the best at dealing with roaming soldiers while you focus on the target.
This target is located just south of guard post number 5 – right in the center of the grass-covered area. He’s a Sniper, and he has five amigos with him. There are two groups with two soldiers each that like to patrol the area, and one bodyguard that stays at his feet.
It’s best to easily remove the wandering soldiers first. If you bring Quiet with you, she can do it in no time. Extract them to your M-Base.
After the two groups have been subdued, you can get to Fultoning the highly skilled soldier out of there, along with his bodyguard. Yet, they both are wearing helmets. Don’t let Quiet shoot at them because it won’t help at all.
Side Ops #21 – Extract – Highly Skilled Soldier 11
We recommend you bring either DD along with you as he can smell your highly skilled soldier location, or Quiet, as she can do half the work for you.
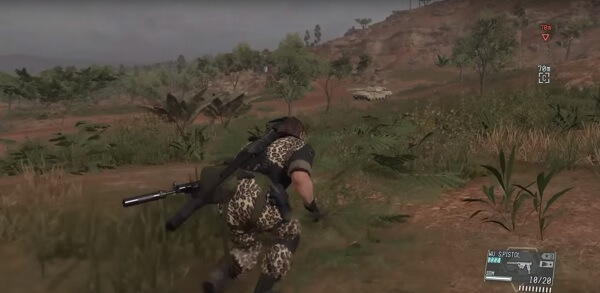
This valuable target can be found lollygagging around the area on the northern part of Munoko ya Nioka. There’s a bodyguard protecting him, as well as other several buddies nearby.
Don’t try to snipe his head, because he has a strong helmet protecting his noggin. You can let Quiet take care of the soldiers surrounding your highly skilled soldier. Afterwards, sprint into action and Fulton your target out of there.
Side Ops #22 – Extract – Highly Skilled Soldier 12
We recommend you bring Quiet along with you, and equip her with the Guilty Butterfly.
Your target can be found near guard post number 13, if you head eastwards. This highly skilled soldier is another sniper for your army. He has five buddies with him that are on guard duty 24/7. There’s a bodyguard, a group comprised of a bodyguard and a sniper just behind your target, and two roaming soldiers.
Also, there’s a trio of decoy soldiers.
If you bring Quiet with you, she’ll do all the work. Position her nearby, where she can snipe all of them. Sit back, grab some popcorn and watch the show.
Afterwards, go in, extract your target and anyone else that you see fit to join your army.
Side Ops #23 – Extract – Highly Skilled Soldier 13
We recommend you bring DD along with you as he can smell your target’s position.
Another Sniper for your Mother Base. This one is located a few meters south of the number 25 guard post. Don’t take the road west from Spugmay Keep, because your target will spot you. Avoid it!
He also has seven amigos with him – one sniper and six pesky soldiers.
If you spawn to the north of the guard post, you can let DD find the target. You can completely neglect the roaming soldiers, at least for the moment, and head towards the hill where the target and his sniper buddy can be found sitting. Subdue them and extract the highly skilled soldier.
Side Ops #24 – Extract – Highly Skilled Soldier 14
We recommend you bring DD along with you as he can sniff your highly skilled soldier’s location inside the base.
A well guarded base, mind you.
If you spawn at the north of the Base Camp, then you can head towards the shooting area. Your target is located at the rooftop of the building that overlooks the range. It’s right next to the Anti-Air Radar.
He will have two guards that protect him. Yet, they are roaming the ground near his position. Apply Tranqs so you can safely unlock the gate. Or, you can climb the stairs to the roof of the nearby building. You can now subdue your target and Fulton him out of there.
Side Ops #25 – Extract – Highly Skilled Soldier 15
We recommend you bring DD along with you as he can sniff everyone’s location within the mansion.
This valuable target is located on the 3rd floor within the Lufwa Valley Mansion. The villa is well-guarded – both the inside and outside of the building is swarming with soldiers. There’s also an annoying sniper prepared to shoot. He can be found sitting on some rocks across the mansion.
You first need to subdue the sniper and a couple of his friends. Then, make way to the stairways outside the mansion. Climb them and you’ll reach a balcony. You’ll find your target roaming the second room. Bait and neutralize him. Take him outside in order to Fulton him.
Or, you can crawl and sneak beneath the mansion. There’s a waterfall stream that flows. You can use your Stun Arm level 3 to blast it and stun everyone inside. You just have to take care of the snipers from the rocks – and his friends.
Leave a Reply